
Connect AWS to Microsoft Defender for Cloud

Connect AWS to Microsoft Defender for Cloud
In this post, I will show how to connect your AWS cloud to Microsoft Defender for Cloud.
Defender for Cloud is a security posture management (CSPM) and cloud workload protection (CWP) platform. It protects Azure, Amazon Web Services (AWS), and Google Cloud Platform (GCP) workloads. Using Azure Arc, you also can protect the on-premises environment. The security posture is part of Defender for Cloud’s free plan and is enabled on all your current Azure subscriptions when you visit the Defender for Cloud pages in the Azure portal for the first time, or if enabled programmatically via the REST API. In addition, Defender for Cloud’s CSPM features extend to your AWS resources.
Defender for Cloud can harden your resources, track your security posture, protect against cyber-attacks, and streamline security management. Because it’s natively integrated, deployment of Defender for Cloud is easy, providing you with simple auto provisioning to secure your resources by default, providing an agentless connection to your AWS account that you can extend with Defender for Cloud’s Defender plans to secure your AWS resources.
Pre-Requisites
See the list of prerequisites on this link: Connect your AWS account to Microsoft Defender for Cloud | Microsoft Learn.
Configuring
Let’s see how to configure this integration.
1 – Open the Azure Portal – https://portal.azure.com/.
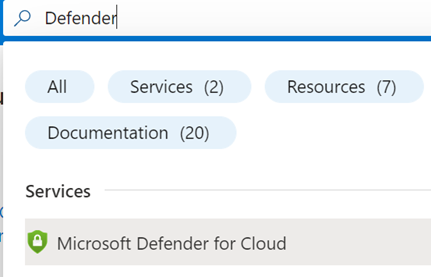
2 – Search for Defender and select Microsoft Defender for Cloud.
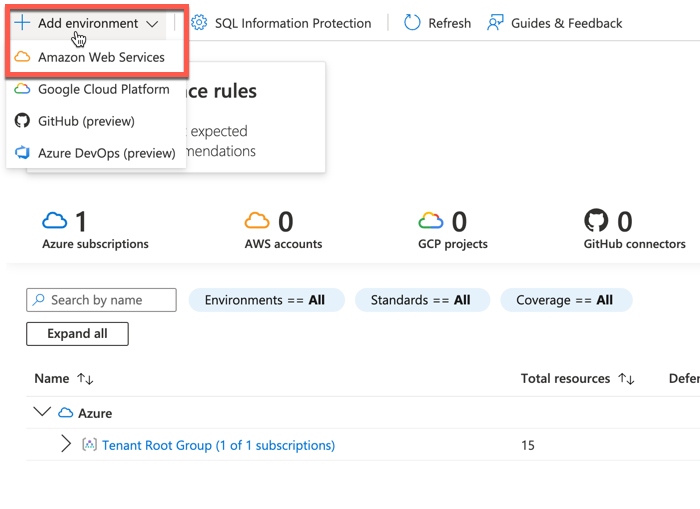
3 – Go to Environment Settings and select +Add environment and Amazon Web Services
4 – Type the Connector Name, Resource Group, Location and AWS account Id.
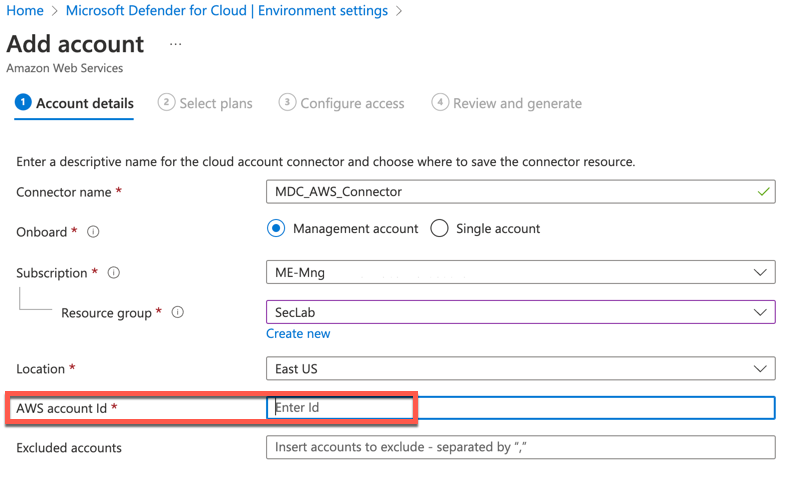
Note: You can find your account ID in the AWS portal, by selecting your username at the top of the right corner.

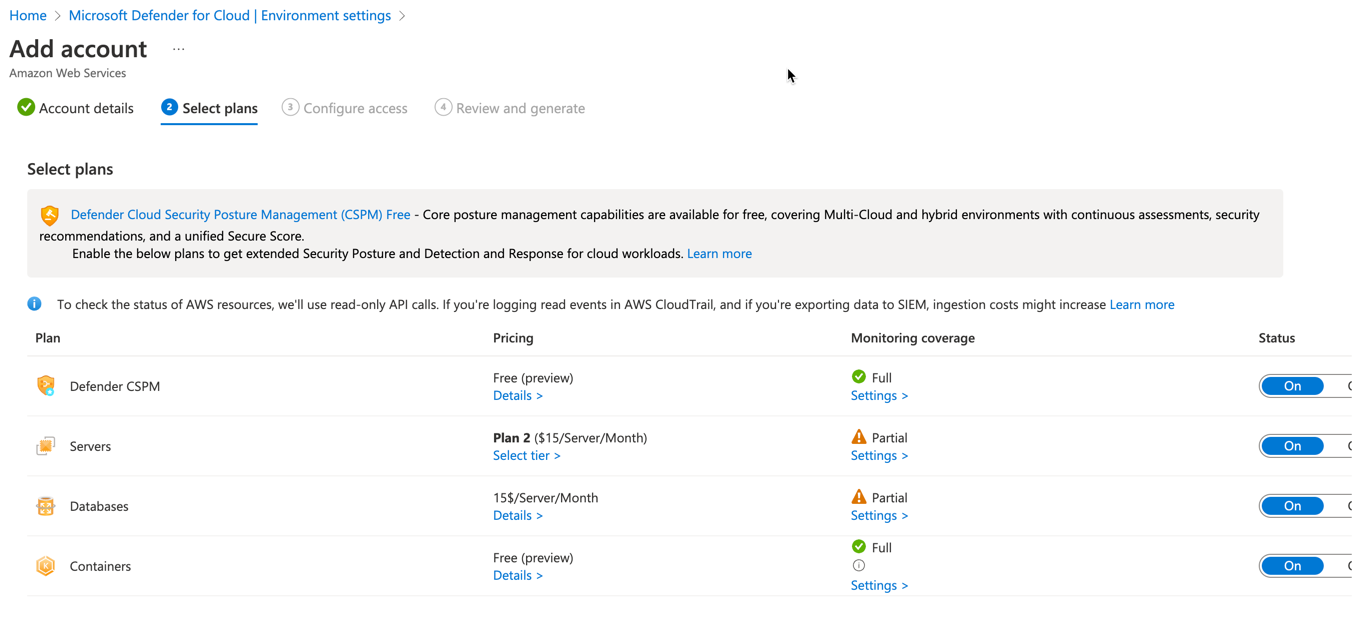
5 – Select the plans you want to enable.
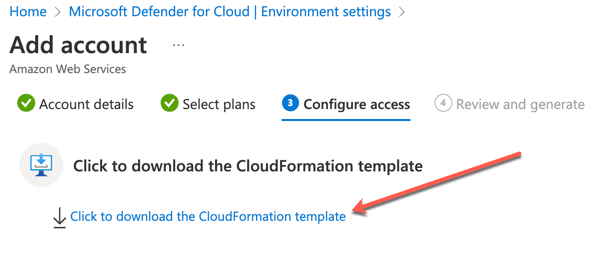
6 – The first thing you will need to do here is to download the CloudFormation template at the top of the page.
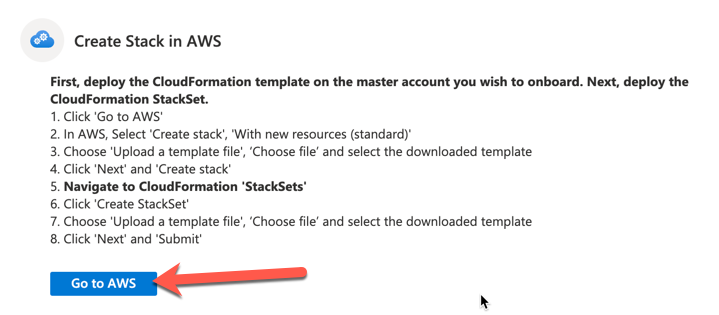
7. Now, click to go to AWS and you will need to insert the template that you have downloaded.
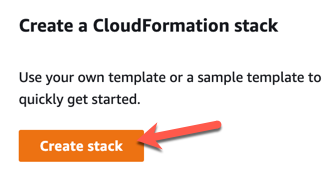
8. In AWS, Select ‘Create stack‘:
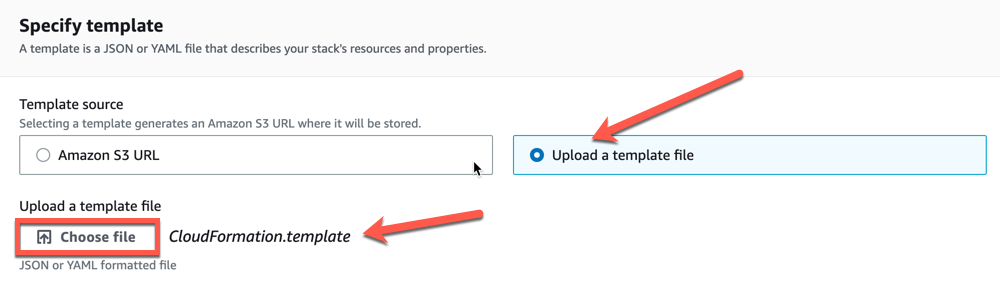
9. Choose ‘Upload a template file’, ‘Choose file’ and select the downloaded template:
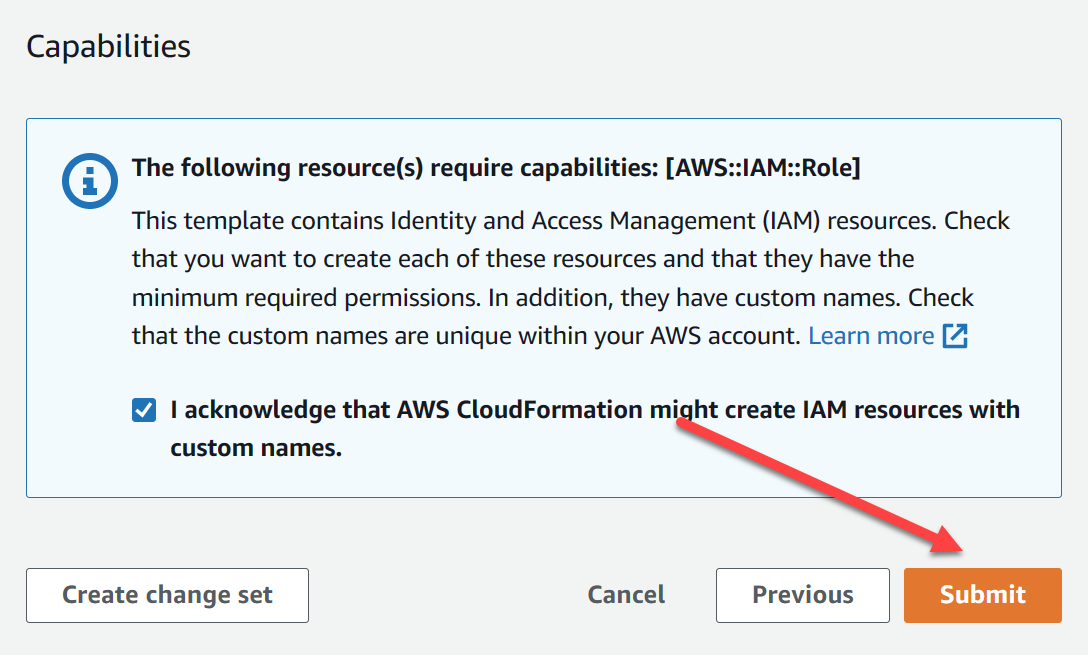
10. Type a stack name.
11. Click ‘Next‘ and go to the last page and click ‘Submit‘.
You should see the following message on the last page:
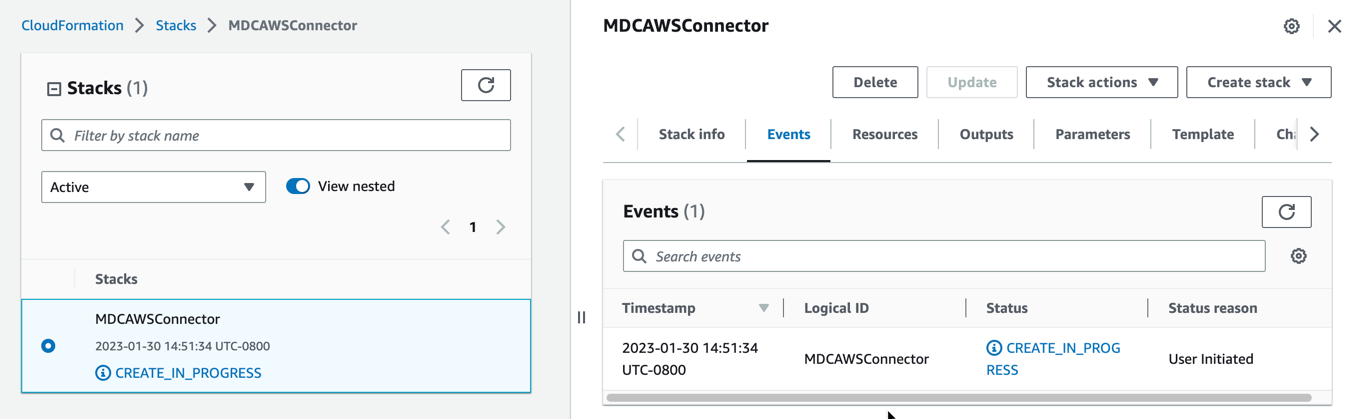
12 – At the end of the creation process, you will see a message like the one below:

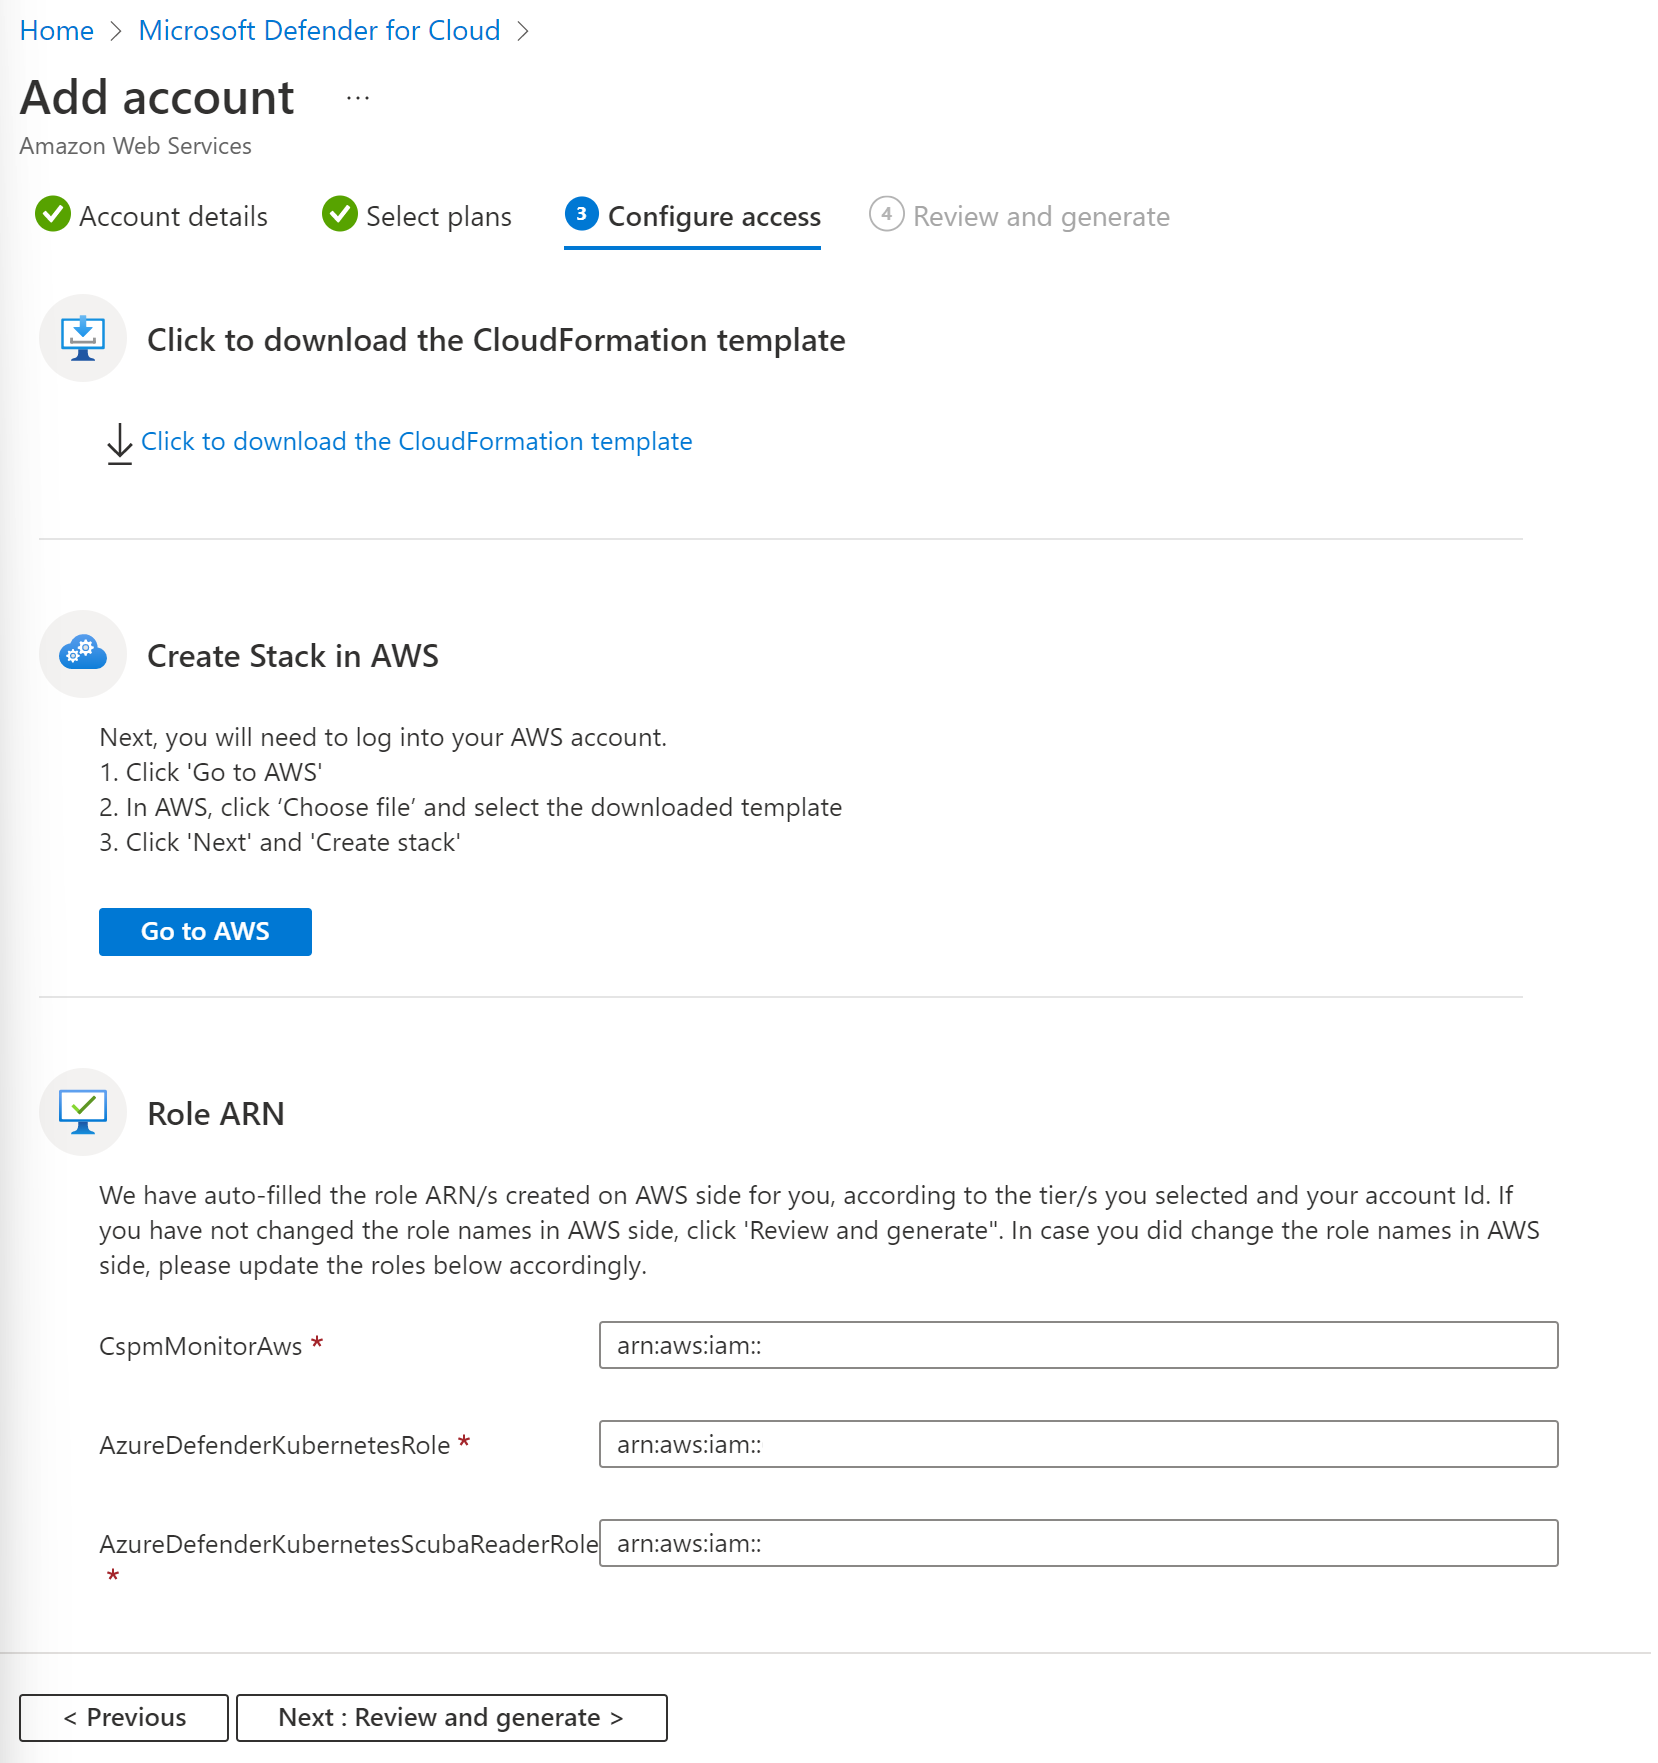
13 – After the stack creation you can move to the next step > Review and generate.
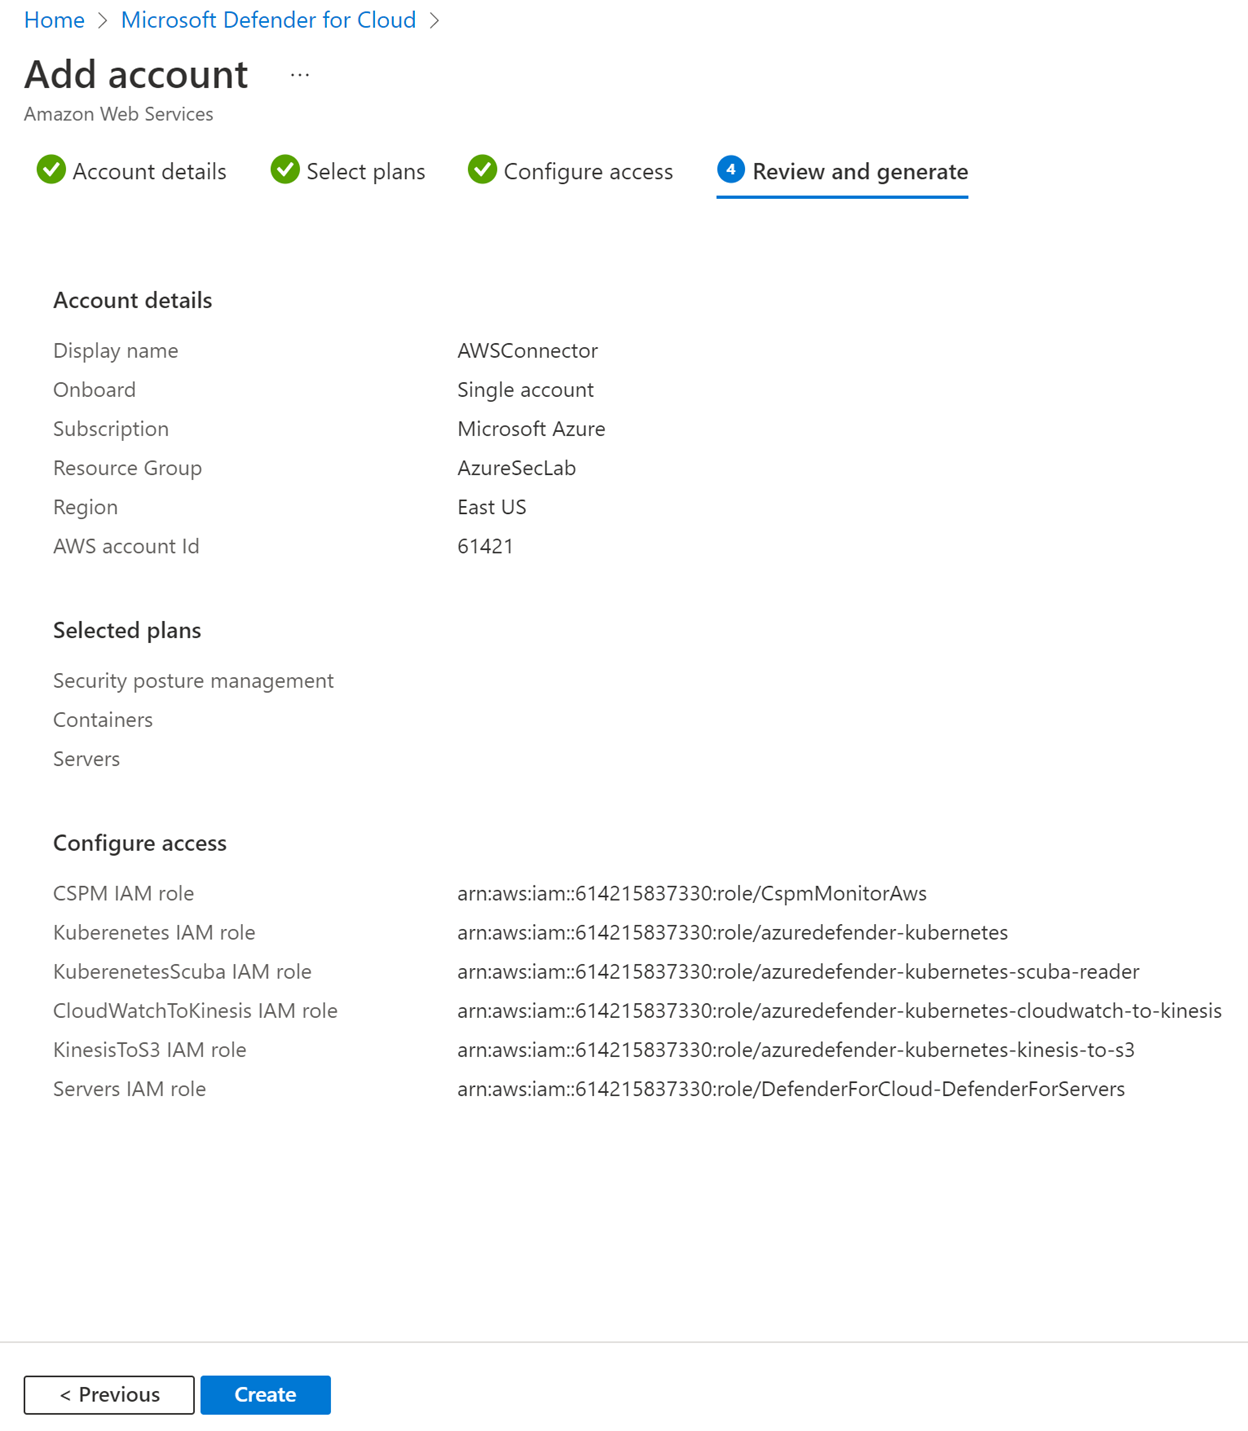
14 – Now, click Create.
15 – You are going to receive the message as you can see in the image below.

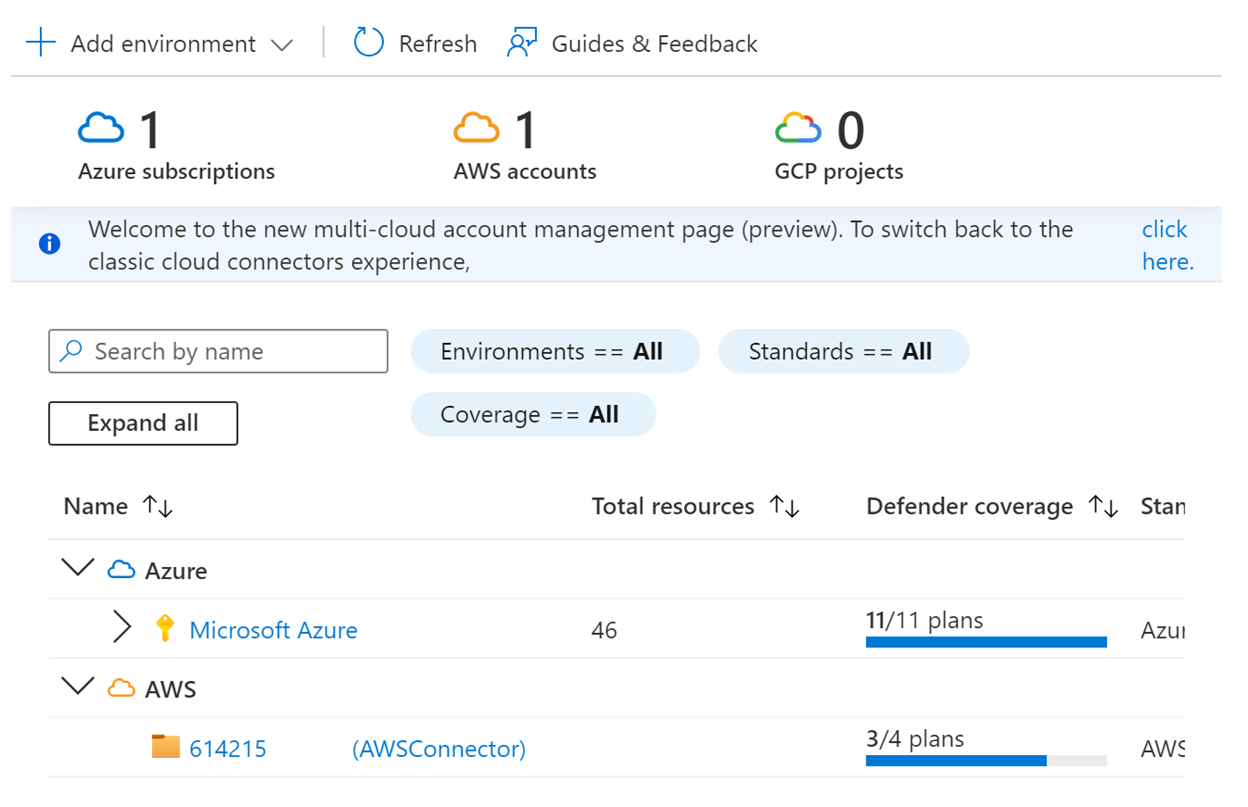
Congrats! Now you can see the AWS connection on your Defender for Cloud portal.
Conclusion
In this blog post, I showed you how to connect an AWS environment to the Defender for Cloud portal to track your security posture, protect against cyber-attacks, and streamline security management for a 3rd party cloud provider.
In future articles, I will show the possibilities you have to protect this environment.
Thank you!