#Lab: How to integrate Alien Vault OTX Threat Indicators into Microsoft Sentinel

The purpose of this blog is to show you how to integrate Alien Vault OTX Threat Indicators into Microsoft Sentinel.
I’ve been working with my peer Brian B with Sentinel Threat Intell integrations, and I wanted to thank Brian for the revision and contribution to this article!
The most common ways to connect threat intelligence sources into Microsoft Sentinel are:
- “Threat Intelligence – TAXII” using server URI & collection ID
- “Threat Intelligence Platforms” using the Microsoft Graph Security API
You can use any combination of connectors mentioned above, depending on what services are available to you and your organization.
The following URL provides a catalog of threat intelligence integrations available for Microsoft Sentinel.
The easiest way is to use TAXII connector, but sometimes your organization wants to use other threat intelligence platforms (TIP) that don’t support STIX/TAXII protocols. This blog will show you how to connect Alien Vault OTX using the Microsoft Graph Security API. This approach can also be used by any custom threat intelligence platform that communicates with the tiIndicators API to send indicators to Microsoft Sentinel:
In this example I’m using the Alien Vault OTX, and we need to use the API method. In this case, the TIP data connector works with the Microsoft Graph Security API. This can also be used by any custom threat intelligence platform that communicates with the tiIndicators API to send indicators to Microsoft Sentinel:

To use this method, we need to import threat indicators to Microsoft Sentinel from your integrated TIP or custom threat intelligence platform. At a high level the steps to be performed include the following.
- Obtain an Application ID and Client Secret from your Azure Active Directory
- Input this information into the LogicApp used to connect your TIP solution or custom application
- Enable the Threat Intelligence Platforms data connector in Microsoft Sentinel
In the case of connecting to Alien Vault OTX, we are able to use a solution available from GitHub, Let’s get started by following these five simple steps.
Instructions:
- Obtain AlienVault OTX API key from AlienVault: https://otx.alienvault.com/
- Create an App Registration in Azure AD
- Obtain LogicApp from GitHub (disabled by default)
- Set the run variables (Tennant ID, Client ID, App Secret, and OTX API Key)
- Enable and run.
Step 1 – Obtain AlienVault OTX API key
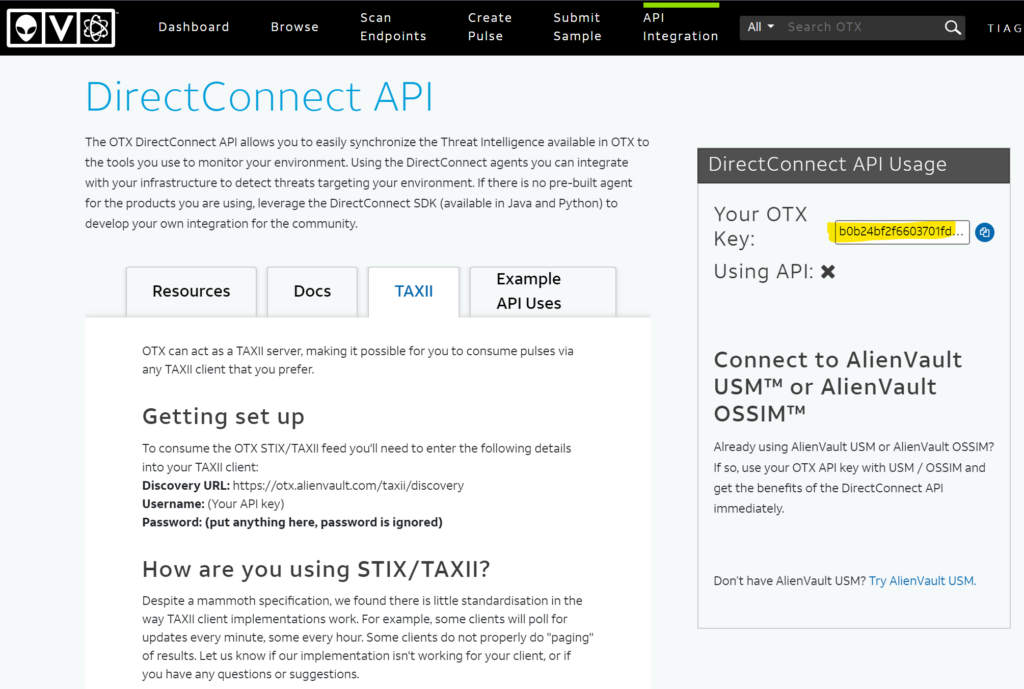
To obtain the API, you will need to login to the AlienVault OTX web site (https://otx.alienvault.com). If you don’t have an account, you can sign up from the home page. Once you sign, navigate to “Settings” page, and locate the “OTX Key”. Copy and paste the OTX Key (alpha numeric string) to notepad or similar text editor as we will need to use it in a later step.
Step 2 – Create an App Registration in Azure AD
When we are using API with AlienVault, we need to be able to accommodate POST requests to Sentinel. To accommodate this to happen, the AlienVault service needs to be represented in Azure AD as an Enterprise application (Service Principal) to have such permissions. Therefore, we need to create an App Registration by completing the following steps.
Open your Azure AD Portal – https://portal.azure.com.
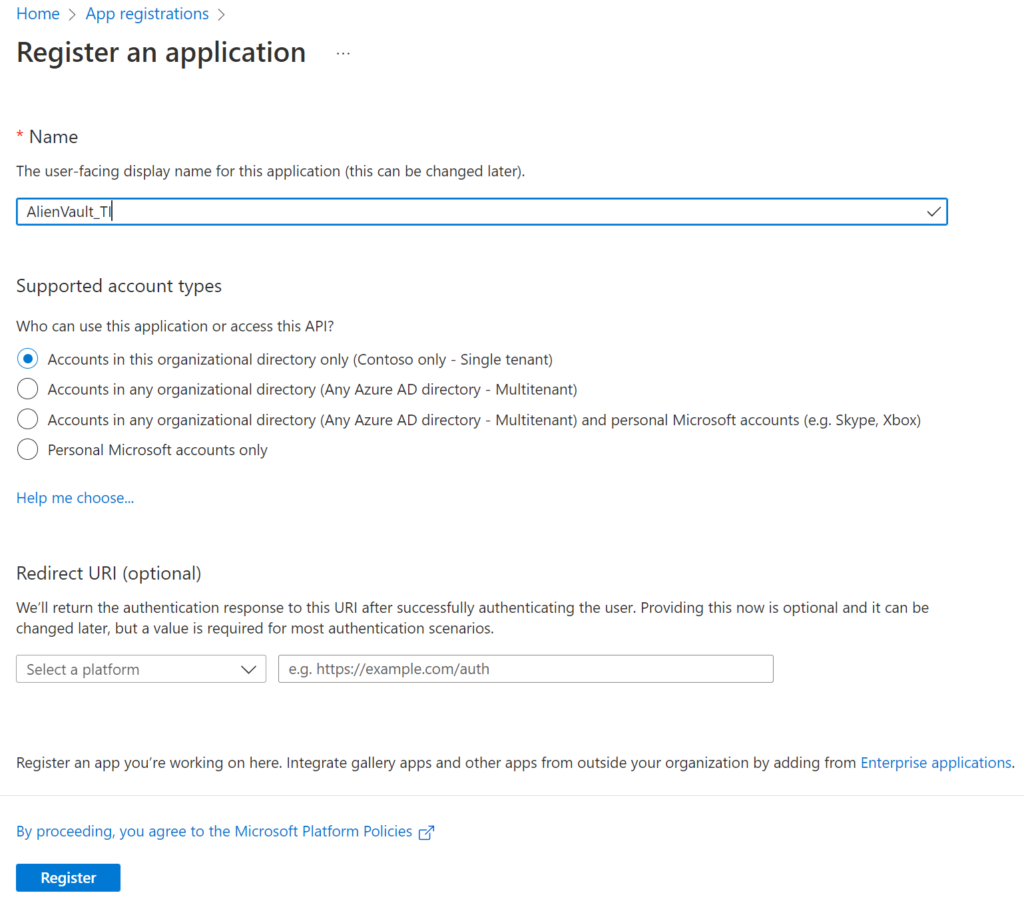
Search for App registrations > +New registration.


For this lab, I am using the default options. If you need more information about App registrations, please check this link.
You just need to type any name for your app and select Register.
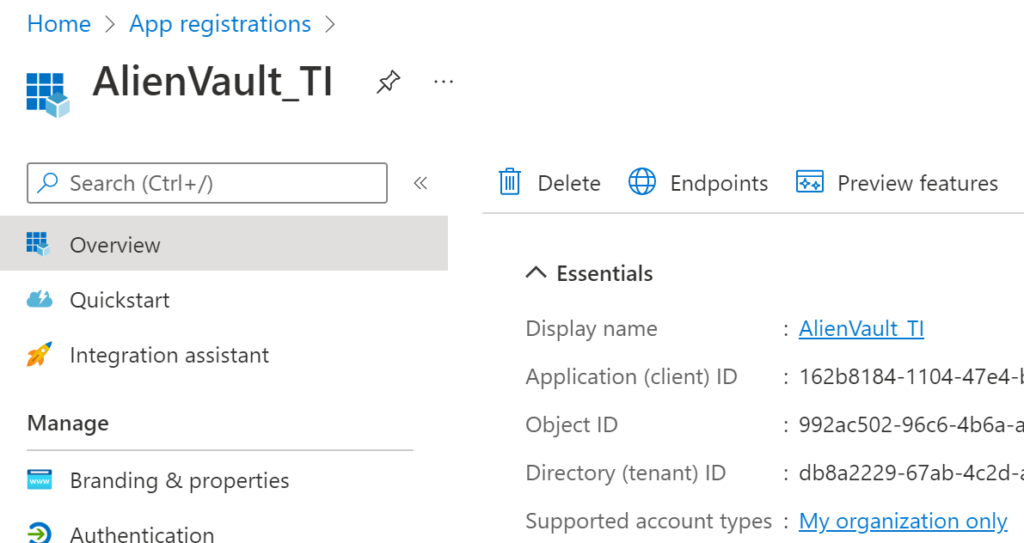
Now, you have an app, and you need to copy and save the Client ID value. We will use this soon.
Now, we need to give the app the appropriate permissions. Select API permissions > +Add a permission.
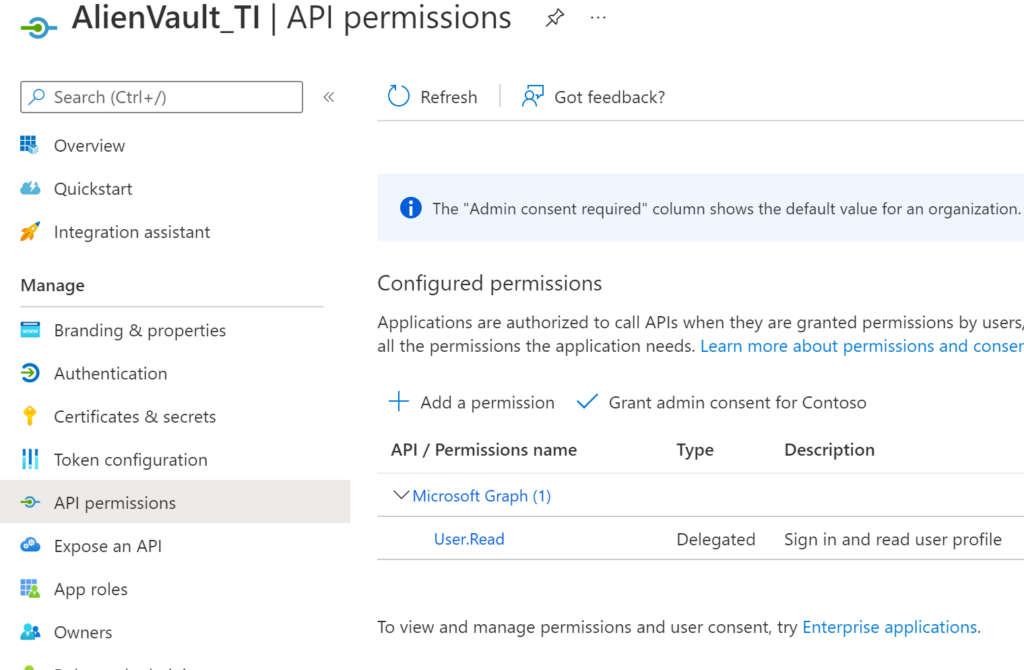
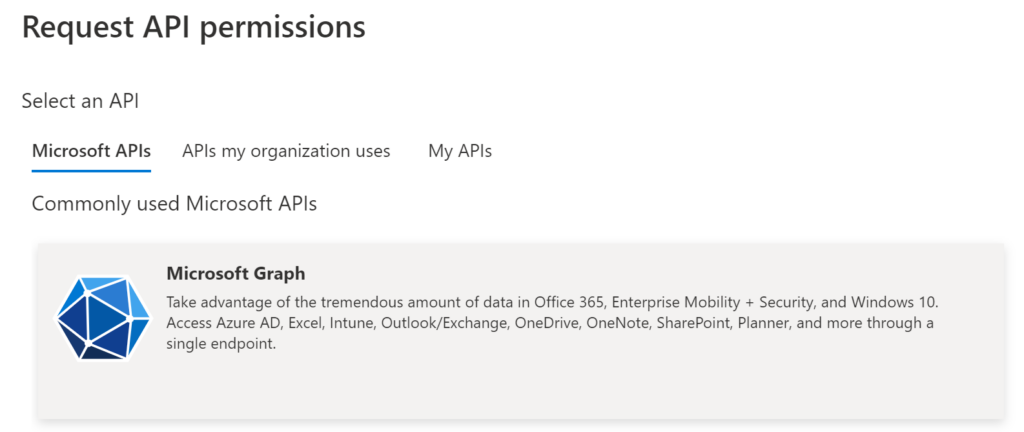
We need to select Microsoft Graph.
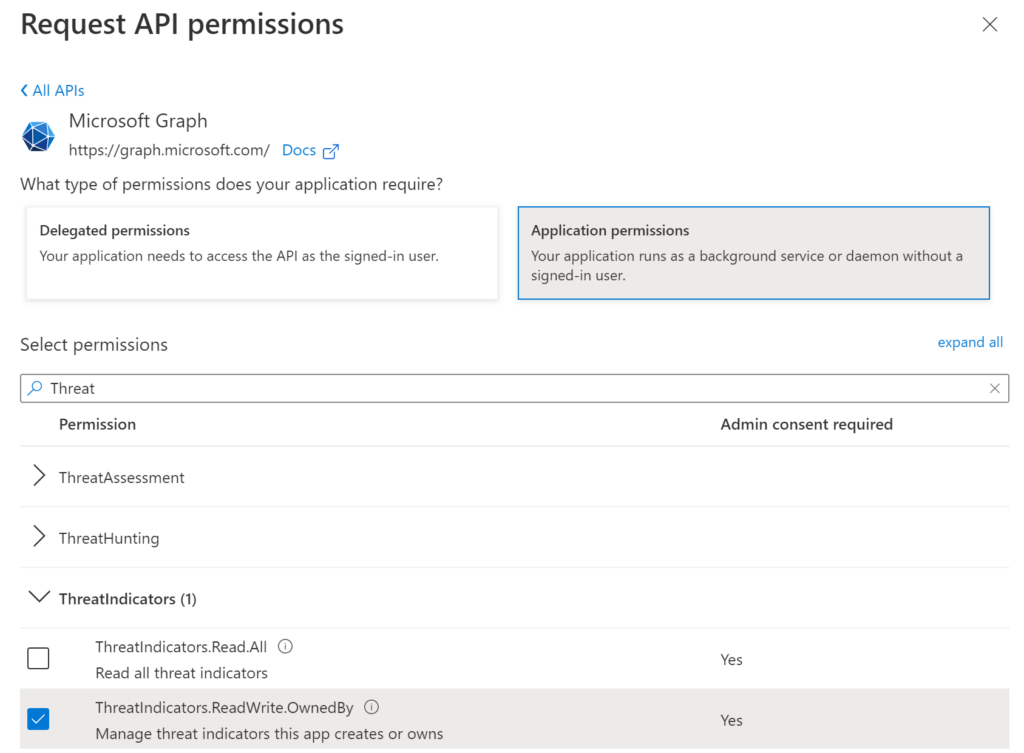
Select Application permissions.

Search for Threat and select ThreatIndicators.ReadWrite.OwnedBy.
Select Grant admin consent for Domain.

You need to confirm the consent action.
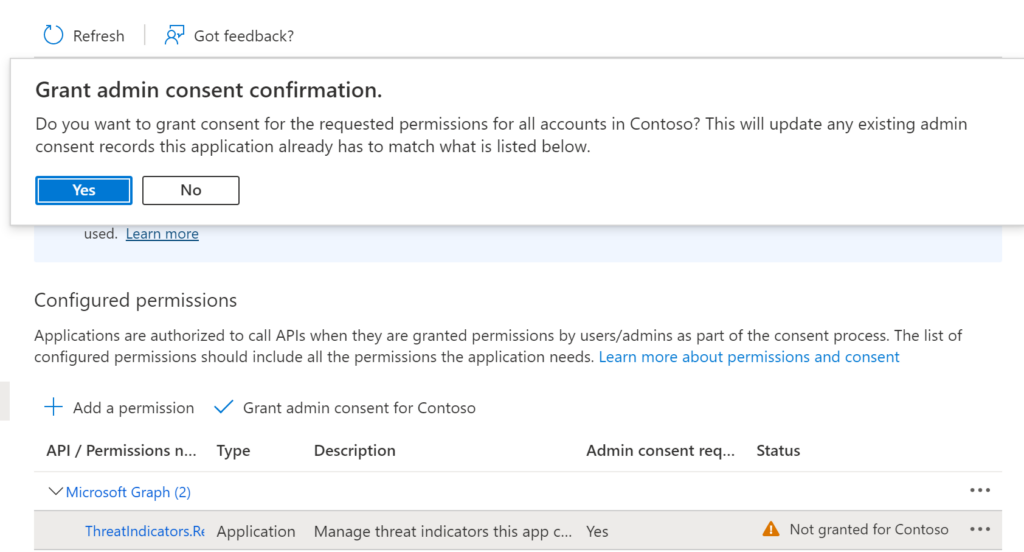
Note: You have to be an Azure Active Directory Global Administrator to select the Grant admin consent for your tenant.
Now we need to create a secret for the application, since we don’t want to have a username/password, right?! 🙂
Select Certificates & secrets
+New client secret
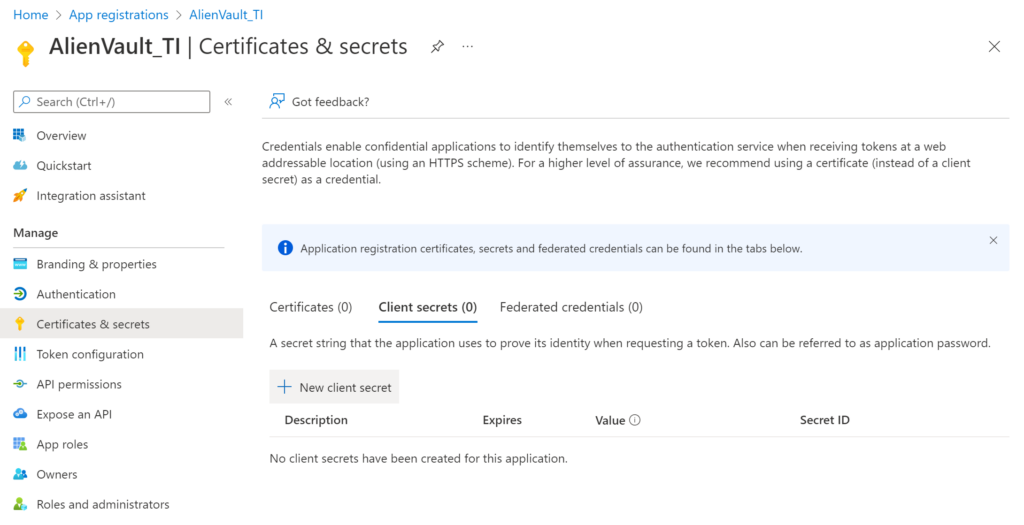
Type a description and select the expiration date. As it’s a lab I am using 24 months.

When you create, don’t forget to take a note of your VALUE, you will need this soon and you will not be able to retrieve.


Step 3 – Obtain Logic App from GitHub
GitHub provides a simple deployment capability to Sentinel. In order for that to work, open another tab from the browser you are using, which is currently logged into Sentinel. In that new tab navigate to the following GitHub page Azure-Sentinel/Playbooks/Get-AlienVault at master · Azure/Azure-Sentinel (github.com). Scroll down to the bottom of the page and click on the blue button labelled “Deploy to Azure”.

This is going to create our Logic Apps and we need to fix them later.
Step 4 – Set the run variables
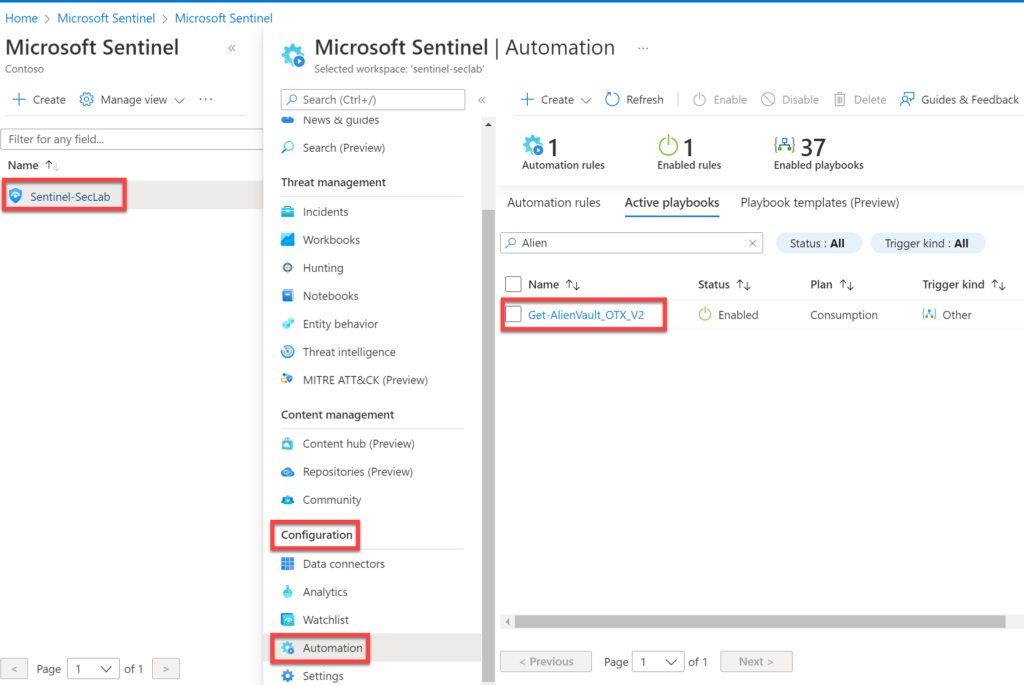
Now locate the logic app (Get-AlienVault_OTX_V2) which was deployed in the previous step. You can find it by navigating the Azure portal > Search for Sentinel > Select your Sentinel > Configuration > Automation and select the logic app.
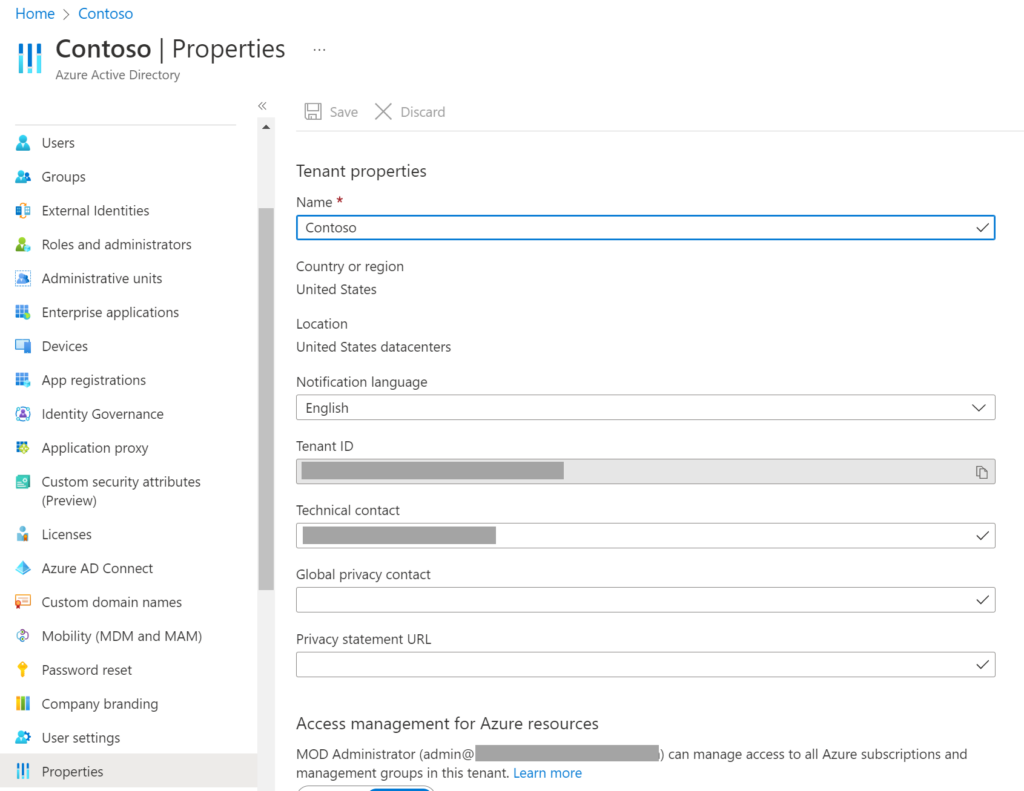
Now, let’s go back to the Logic App. You can also get there through Azure portal > Search for Sentinel > Select your Sentinel > Configuration > Automation and select the logic app.
Select Logic app designer.

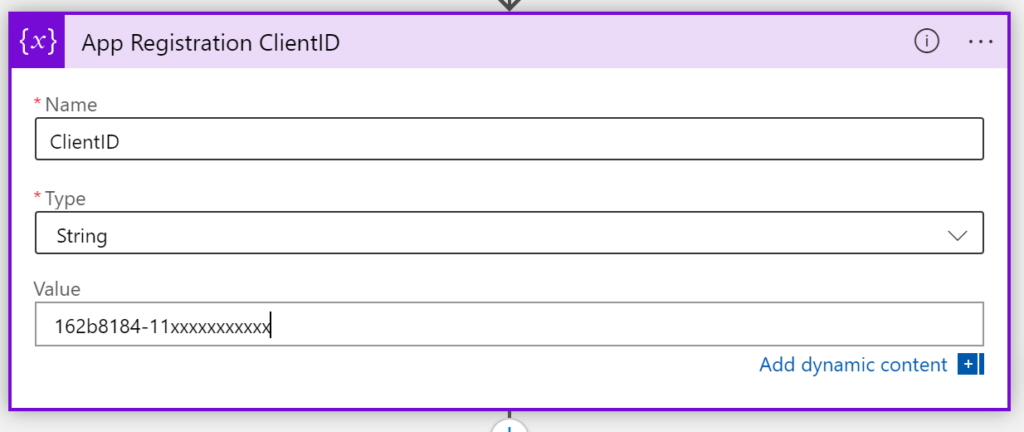
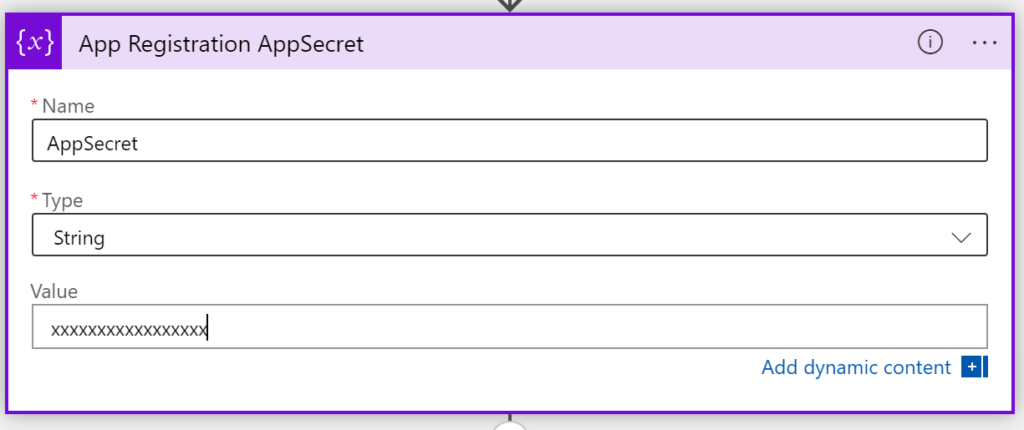
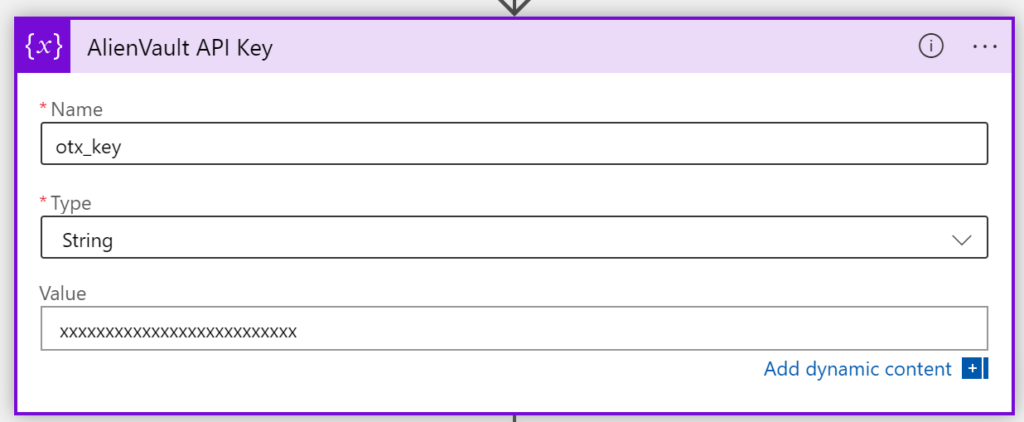
Now we have to set some values.
TenantID
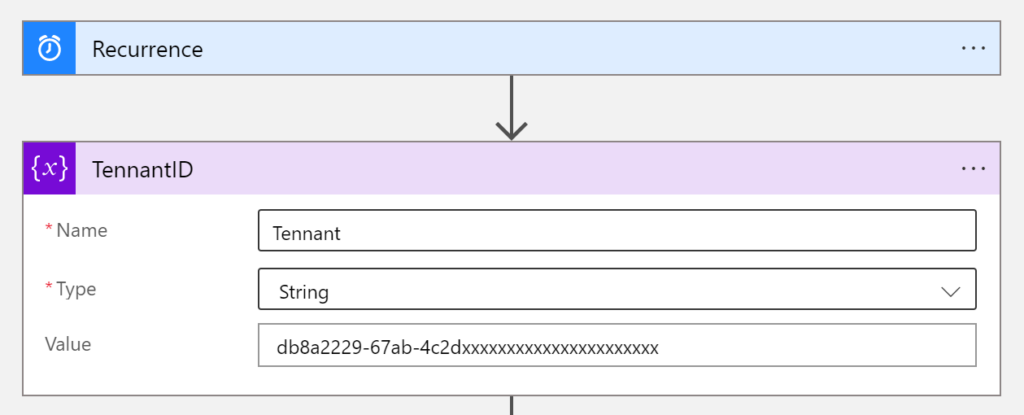
ClientID
AppSecret
AlienVault API Key
Step 5 – Enable and run
Now, we just need to enable and run our Logic App.

In a next blog post I will be posting about how to create some use cases for the threat intelligence connectors.
References:
Azure-Sentinel/Playbooks/Get-AlienVault_OTX at master · Azure/Azure-Sentinel · GitHub
Bring your threat intelligence to Azure Sentinel – Microsoft Tech Community
Use the Microsoft Graph Security API – Microsoft Graph v1.0 | Microsoft Docs
Understand threat intelligence in Microsoft Sentinel | Microsoft Docs
Thank you!

